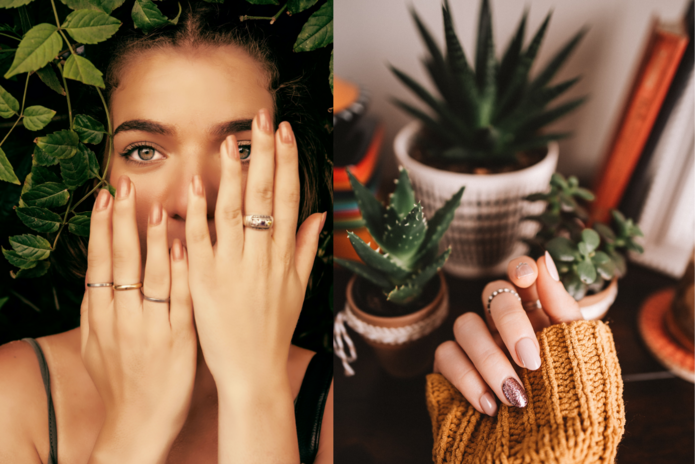
In the evolving world of style, nails have become one of the most popular elements of expression. In college, sometimes budgets can be tight and we cannot always have the luxury of going to the salon every two weeks. It seems every time we go we end up paying upwards of 70 dollars! However, just like many other college students, I love looking my best and presenting myself well. Whenever I have a fresh set of nails I swear I become more productive. I feel more put together and ready for what the world is going to throw at me. I have a solution to this problem of beauty costing a fortune. We can still be able to get our nails done but instead of going to the salon, why don’t we bring the salon to us? We should start doing our nails from home! I know this may sound scary and you may not even know where to start. But this is why I created an article giving you a description of the five most common techniques salons use. See this as a guide to the different methods you can use to achieve a classy manicure from home. With this secret out salons don’t stand a chance, everyone can be a baddie on a budget.
- Elevated Polish Manicure
So let’s start with one of the easier techniques. This is the simple nail polish from any drug store or chain store. However, we can switch this method up and achieve a salon-quality manicure by using more than just a singular colored polish. Elevate your typical polish with a strong base.
Start by prepping your nail with cuticle remover. Cuticle remover is a product that is used to soften and help dissolve excess skin that forms around our nails. This then starts us off with a good foundation for our next step, a base coat. A base coat helps with keeping the longevity of a manicure, creating a bond with the color and your nail. Make sure you give that base coat time to dry. The next step would be to apply multiple layers of the colored polish of your choice. The key here is to make sure you keep a thin coat and make sure your brushstrokes go from the base of your nail to the top. This may take more time and patience, but I promise you the results will be so good, you won’t even think twice about going back to the salon. Make sure to give each layer time to dry before putting on the next coat. Once the colored polish is done drying, add a topcoat, this will lock in everything.
All of this should only take you around 30 minutes. A perfect place for you to find all these products can be at a beauty supply store such as Sally’s Beauty, I know we have one right here in our wonderful town, Chico California. You can also order all these products through the internet or Amazon.
- Gel Polish Manicure
The second technique that could be used for a home-curated manicure, is Gel Polish. Gel at the salon is usually extra due to its long-lasting technology. The process is very similar to our elevated polish manicure however, it requires one extra tool. A UV lamp to cure. When the gel is cured, it becomes very strong and usually lasts longer than typical polish. In about 60 seconds it cures under the light and goes from wet polish to dry material and hardens over your nail. With gel like I said before you will need a UV lamp, a cuticle remover, a nail dehydrator, a base coat, colored gel polish, and a topcoat.
The base coats and topcoats used for gel are different from the ones used in standard manicures. This is because of their different chemical makeup which needs to be cured under the lamp. This manicure process starts with dehydrating your nails with a liquid called “nail dehydrator”. This absorbs any moisture on your nails which helps the base coat stick. After that you push back your cuticles, apply your base coat, and cure for 60 seconds. Then you add a layer of gel color and cure for another 60 seconds. You may want to add another coat once that is dry. Do at least two coats of the colored polish for an even color deposit. Then finish with your top coat and cure once again for 60 seconds. You may want to use some rubbing alcohol afterward on your nails to get any residue off.
After everything is set, the total time it takes for someone to do a gel polish is around 15 to 20 minutes. That is almost cutting your time in half compared to doing a basic polish manicure at home. There are kits/sets of gel polish available online. This may be easier than buying everything individually. Gel polish is a little more advanced than a basic polish manicure however, it gives you long-lasting results staying on between two to three weeks.
- Dip-Powder Manicure
The next technique we are bringing home is the Dip Powder method. Dip powders are similar to acrylics. It creates a strong solidified coating around your nail from a finely pressed powder. The term dip is derived from you physically dipping your nail repeatedly into the powder. However, because of the fine powder used, it is more breathable for your nail. Many say that this is a healthier alternative to acrylics.
What you will need is a base coat, top coat, activator, dip powder, UV Lamp, and files. You don’t need any polishes for this method. Depending on the kit you may get a UV light may be required to solidify the base coat as well as the topcoat. Not all kits require this: make sure to read the instructions on your kit when receiving it. The process for dip is the same either way. You will prep the nails like discussed before buffing your natural nail and priming with nail dehydrator. Start with the base coat, after the base coat start dipping your finger directly into the powder. Make sure to keep it at a 45° angle so the whole nail becomes covered. Brush off the excess and repeat this cycle two to three times.
What is nice about dip powder is the powder contains the color. So no need for any extra polishes. After that apply the activator, file your name nail, and buff any uneven areas. Apply the topcoat (either let that cure or dry). And there you go dip nails from home! Dip kits are sold online and may be found in stores as well. I know there are some really good kits from Amazon and I know Target sells them in stores. This technique can take you around 30 to 45 minutes to finish. However, this method elevates your nails from a typical polish to a look-alike acrylic.
- Poly-Gel Manicure
The next method you can do at home for a perfect manicure consists of using Poly-Gel. Poly-Gel is a buildable material that hardens under a UV lamp, also creating an acrylic style nail. Poly-Gel can be found online once again and can be found in kits. Poly-Gel personally, is one of my favorite ways to do my nails at home just because of the simple materials and easy-breezy application.
You start your Poly-Gel manicure by pushing back your cuticles, using a nail dehydrator, and laying a base coat down. Make sure to cure that base gel for at least 60 seconds. Poly-Gel does not need any extra polishes or color. The color is integrated into the material itself. Start off by using the nail forms included in the kit or individually purchased and put a very small amount of Poly-Gel into the curved indent of the nail form. I’m talking small, like a pea-sized amount. Then press that form with the pea-sized amount of material onto the nail starting at the base. This then causes the Poly-Gel to be pushed up to the top of the nail and completely cover it. Then stick your nail into the UV lamp and cure it for around 60 -90 seconds.
Then when all nails are complete, pop the nail forms, buff, and shape to your desired look. Now you know how to achieve a Poly-Gel manicure done within 15 to 20 minutes. These nails can last up to three weeks and look like you just stepped out of the salon.
- Acrylic Manicure
The last technique I have for you is the classic acrylic set. In all honesty, this technique requires the most materials and practice. This is due to the liquid and powder ratio used to form the nail. You have to work very quickly because this material dries within seconds. The materials needed are the acrylic liquid which is called monomer, and the acrylic powder which is called polymer, an acrylic brush, nail tips, nail glue, nail dehydrator, basecoat/ topcoat, nail file, dappen dish and UV Lamp.
It may be easier to get an acrylic kit rather than purchasing all of this separately. With the Polymer some may contain a color which can save you from an extra step of painting over the acrylic. If the Polymer is not the color you would like, feel free to paint over your Polymer once applied, dried, and buffed. You start this process by cutting the cuticles and buffing your nails so the tips you glue on can adhere better. Then apply the nail glue to the bottom of the nail tip and glue on to the top of your nail. Afterward, you can shape and cut the nail tip to your desired look. Then proceed with dehydrating your entire natural nail. After that start on the execution of the monomer and polymer. First, add the monomer which is the liquid needed into the dappen dish. ( A dappen is a little bowl that holds the liquid). You then dab your brush into the liquid and then dab your brush onto the top of the powder. You do not want to completely submerge your brush into the polymer powder whatsoever, you just want the tip of your brush to fall in and create a tiny little “bead”. You then tap that “bead” onto the base of your nail, building upwards to the tip of your nail. Let the acrylic fully dry and then buff any uneven areas.
You can apply a gel polish if you do not have a colored polymer. Make sure to apply a base coat on top of the acrylic you laid, then two layers of gel polish, and then your top coat. Curing for at least 60 seconds each time. But if your polymer does have your desired color you do not need to paint the acrylic, feel free to finish off the nail with your topcoat and use the UV light to seal the deal. Acrylics are one of the longest nail processes and can take an hour to an hour and a half. However, with good practice you can save thousands yearly.
These are five of the most used methods within a nail salon and are totally achievable at home. These techniques range in difficulty however, knowing which method best fits your vibe can help your nails go from drab to fab within a matter of minutes. I hope you found a technique that you feel comfortable performing and gained new confidence today. I know we are all talented and able to express our creativity through a simple manicure. Be nice to your nails today and treat them to a nice makeover from the comfort of home.


