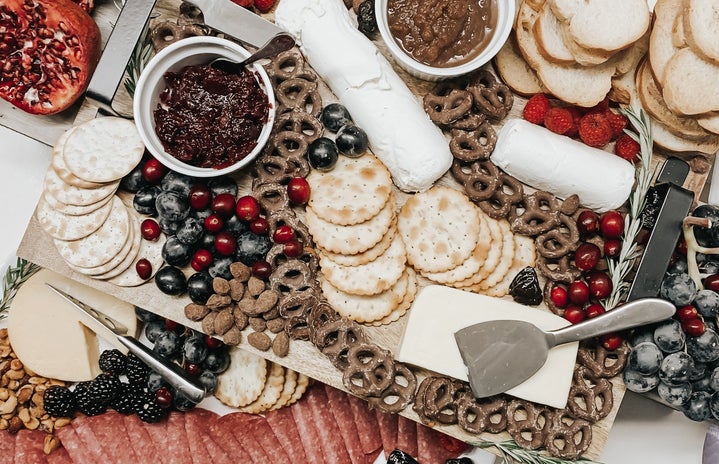
Say CHEESE!!
Calling all cheese lovers! Alright, if you’re a cheese lover, you’ve definitely heard about charcuterie boards. Your Instagram feed is probably full of them at the moment. But the prettiest cheese boards can cost upwards of a hundred dollars, which is unfortunately unacceptable for our meager college budgets. I personally never thought I could pull off making (relatively) inexpensive charcuterie boards. So I settled for scrolling through social media and living vicariously off of the perfectly assembled, aesthetic as f*ck, cheese board picnic set-ups. I never even thought to try putting one together until I called all my girlfriends over for a wine night a couple weeks ago. After going to the store and looking through my fridge, I was pleasantly surprised to learn that assembling a cute board was not nearly as hard or expensive as I imagined. Now, before you continue reading, do not be mistaken, I am in no way a charcuterie board expert now. But I thought I would make a basic beginner’s guide to perfecting charcuterie and share some things I learned. Time to jazz up your next wine night!

Let’s start with some essentials:
- Crackers or bread– first look to see if you have any boxes of crackers or sliced bread in your pantry already. You might be in luck. If not, pick up one or two boxes of your favorite crackers (or a small baguette and slice it up) and you’re good to go. I like pretzel crisps and Ritz crackers a lot.
- 2-3 cheeses– get a few small blocks/wheels of cheese. If they are small sizes, altogether the cheeses should not have to cost more than $10! I recommend choosing different textures and flavors of cheese. My personal favorites that deserve an honorable mention are Brie and Cheddar. I also recommend getting a soft, spreadable cheese. You can even use cream cheese or a dip as one of the options!
- Meat– hear me out, deli meat can go a long way. It is all about the presentation, so roll those slices up nice and you are set. If you are balling on a budget, it is a good alternative to more expensive meats.
- Fruit– my personal favorite is grapes, but you can choose berries, oranges, or whatever you prefer. Dried fruit can also pair really well with everything!
- Nuts– adding different textures to the board makes it more fun. Nuts will add some crunch, so if you like nuts, throw a handful on there.
- Cheese Knife– if you are ahead of the game and own a special cheese knife, go you. Otherwise, do not feel the need to buy one. We’re in college, a regular knife from a silverware set will suffice.

Extra condiments you can add:
- Olives
- Honey
- Jam
- Assorted dips
- Chocolate covered nuts or pretzels
Here are a few tips:
- In order to avoid wasting too much food, keep in mind the amount of people you are hosting or making the charcuterie for. Some of the overwhelmingly stuffed boards we see online are just not realistic. A smaller board can be just as cute as a big one if there aren’t going to be that many people. Don’t go overboard! You can always leave more stuff out to the side in case you run out and add as you go!
- Look for ingredients or condiments in your fridge and pantry first. You might already have some things you can dress up your board with, so look through your kitchen and see what components of the board you might already have before making a grocery trip.
- The actual presentation matters more than the components. You can make cheaper ingredients look fancy, I promise! Cut cheese slices into different shapes (squares, rectangles, triangles) or even keep a cheese wheel whole to mix it up. Also, try to fill the board and avoid too many gaps. If you are serving a smaller amount, use a smaller board!
- Sweet and salty balances really well, so even though it will be a primarily salty assortment of foods, try to add fruits, or even some chocolate to put some contrast in the flavors.
- Make it colorful! This will make the board look more fun. Colorful fruits are the best way to bring in some more vibrant colors.
- Honestly, there are no rules to making the “perfect” charcuterie board! Everyone has different tastes, put things on there that you like!
Cheers!


