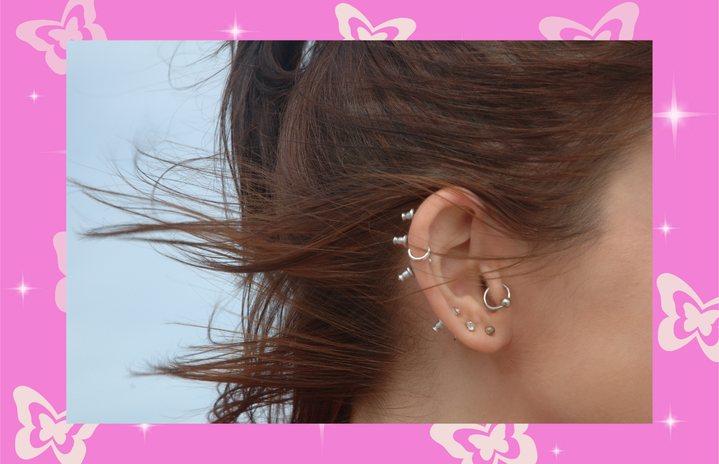
My piercing journey starts at a Claire’s in suburban Illinois in 2009, where, after years of begging, my mom finally let me get a pair of lime green earrings unceremoniously punched into my lobes with a gun. It was jarring and traumatic, but nobody could deny that my ears were popping. Simply having the piercings changed my entire attitude, and throughout the next few years I jazzed up my look with colorful studs, trendy statement pieces, and a handful of homemade jewelry.
As I entered high school, I fell out of love with my singular set of piercings, kind of like a garbage trend. Suddenly earrings felt boring, and I consequently abandoned an aspect of my style that had previously brought me so much joy, leaning away from incorporating jewelry into my outfits. But in college, when I discovered the trend of constellation piercings, I became intrigued once again. The randomness, the versatility, and the delicate asymmetry fascinated me, from the cartilage to the lobes. In a fit of inspiration and atypical spontaneity, I got my second lobe piercing done with a piercing needle at a tattoo shop (a much better experience than the piercing gun), and the effect was immediate. Through curating my ears, I felt more confident, more beautiful, and more excited to explore my taste.
In short, adding two small holes to my ears transformed my self-perception and reinvigorated my waning interest in style. Two days later, I was buying a pack of fifty piercing needles and making a sterile saltwater concoction on the stove in preparation of the next set of piercings I had already decided I needed. Multiple self-done piercings later, I couldn’t be more excited about how my ears looked.
While I’d never pressure you to pierce your own ears, sometimes it’s the most viable option (my second lobe piercings at a shop cost $110, while I spent $8 on a 50 pack of piercing needles and $10 on a pair of sterling silver studs for my third). Piercing yourself at home can be incredibly simple, relatively cheap, and safe – as long as you do it correctly. (We’re not piercing with a sewing needle or a safety pin here.) Here’s how to do it.
1. CHOOSE BETWEEN A PIERCING NEEDLE AND A PIERCING GUN – Not A Sewing Needle Or A Safety Pin
Some people may be tempted to go with a piercing gun for its ease, but consider this, first: “Some people prefer the use of piercing guns as they believe it is a faster, less painful, and cheaper method for piercings compared to needles,” Nic El and Alina Rods, owner of and professional piercer at Gorilla Tattoo Paphos, respectively, tell Her Campus. “Even though this option is slightly faster (as the jewelry is mechanically forced by springs through the tissue) and cheaper (low-quality jewelry [with] no disposables used such as needles, tools, forceps, etc.), it [comes with a] high health risk, longer healing time, and [is] significantly more painful.” Gorilla Tattoo Paphos never offers gun piercings because of this. The high-velocity pressure a gun uses to push studs through the tissue cause blunt force trauma, which can lead to cartilage or nerve damage, increased redness, swelling, infection, scar tissue, and the potential need for medical attention.
“Additionally, piercing guns don’t meet the standard sterilization requirements and are prone to infection and disease transmission,” they say. “Guns use particular studs where their design and length are unsuitable for natural piercing healing. Based on the above, piercing guns are banned by the Association of Professional Piercers (AAP).”
If you want to minimize the risk of infection and maximize ease for a DIY job, invest in a pack of sterilized piercing needles over a piercing gun (or a sewing needle or safety pin from your junk drawer – we’re not pulling a Parent Trap here). “What’s worse than piercing guns is doing it yourself with sewing needles and safety pins. Home attempts to sterilize the sewing needle (by burning it or dipping it into pure alcohol) are never sufficient, nor safe. Sterilization is only effective through a combination of strong specialized chemicals and medical autoclave ovens.”
Proper needles are hollow, designed to completely remove a tiny bit of skin and tissue from the hole, and make inserting the earring easier and less painful. “This method doesn’t damage the surrounding tissue, is completely sterilized, and only one-use/pre-packaged needles are used,” El and Rods say. It’s important to note, however, that this is said in reference to professionals. The two advise you to avoid piercing yourself due to the risks associated, warning, “All downsides of piercing guns apply to home piercing practices, and you may end up with shattered cartilage, infection, and permanent lumps.”
If you still want to proceed with your own piercing, just make sure you acknowledge all of the risks ahead of time.
2. Gather the rest of your supplies.
The piercing tool is perhaps the most important part, but there are several other things you’ll need on hand before you’re ready to get started.
First, you’ll need to know which jewelry you’re going to use during the healing process. You should plan to leave the same pair of earrings in for a minimum of six weeks. “Professional piercing parlors and tattoo shops only use high-quality jewelry (such as surgical titanium), which is hypoallergenic and ensures a smooth healing process,” El and Rods say. Cheap jewelry runs the risk of allergic reactions, so make sure to invest in a nice pair.
Other necessities, such as rubbing alcohol, saline, or salt water, a clean sponge, a fine point pen, and cotton rounds or q-tips, should be readily available.
To mentally prepare, I’d suggest watching a piercing video on YouTube so you can visualize what to expect. Understanding the technique will put your mind at ease and give you a better idea of what you need, how to set it up, and how to both pierce yourself and take care of it.
3. PREP YOUR SETUP.
Dr. Jeannie Kenkare, Chief Medical Officer of PhysicianOne Urgent Care, says the most important thing to consider with at-home piercings is to ensure you’re minimizing your risk of infection. “Preparation is key,” she tells Her Campus. “Be sure you have all your supplies prepared before beginning, and start with clean hands.” You should also make sure to clean the skin you’re going to pierce, either with rubbing alcohol or soap and water, as well as the earrings you’re going to be putting in.
Find a place with ample counter space, a mirror, and good lighting. Lay out all of your supplies so that they’re readily available when the time comes (but don’t open your needle until you’re ready to use it). Once everything you need is ready to go, mark the spot(s) you intend to pierce with ink and examine the placement in the mirror to make sure you’re happy with it.
4. Pierce your ears with your needle.
I would suggest holding a square of new, clean sponge behind your ear (it will absorb the needle as it comes out the other side of your lobe. With cartilage, which is much stiffer, this is less necessary). Turn slightly so you can see both the front and side of the area you’re piercing, and hold the needle gently at the skin’s surface. Make sure that the placement and the angle are to your liking – if you don’t get the right angle, it could be difficult to insert jewelry into the new piercing. For a lobe piercing, you should have the needle completely horizontal from front to back, and you should push the needle through in one deft motion. It’s much easier to do it quickly: if you’re going to do it, commit.
When the tip of the needle exits the other side, pull it through until only a tiny portion of the end of the needle is visible on the front side of your ear. The hollow design of a piercing needle allows for the easy insertion of an earring into the end. Put the earring post into the hole, pull the needle the rest of the way through, and the earring will glide into your ear. This is much less traumatic than the usual at-home method of using a sewing needle and shoving an earring straight into the fresh hole immediately afterward.
Put the back on the earring and move on to the next one, assuming you’re piercing more than one spot.
5. Give your new piercings the proper aftercare to minimize the risk of infection.
You’re not done just because the earrings are in place. “After the piercing is performed, proper care of the area is critical,” Dr. Kenkare says. “Wash your ears with soap and water at least once daily.” She recommends doing this for at least six weeks to ensure that the piercing heals properly. Most piercers recommend cleaning two to three times a day and also offer sea salt soaks as an appropriate cleaning option.
Try not to sleep directly on the piercings, and don’t twist or play with the jewelry. Outside of cleaning, just leave it alone and let it heal. Of course, if you notice any increase in swelling, redness, or tenderness around the piercing, enlarged lymph nodes, or drainage near the piercing, you should seek medical attention. “These are signs of infection that can be serious if not effectively treated,” she adds.
Wait to change your jewelry until at least six weeks after you’ve pierced yourself. After those six weeks, feel free to mix and match, change it up, and enjoy your newfound excitement over the possibilities in store for your ears.


