It’s December and the Holidays are fast approaching. Everyone has begun decorating for the season, but trying to buy festive decorations at this time of the year is often a stressful and expensive process. However, making decorations yourself is a great way to make your space look great without breaking the bank.
Here are some simple that are easy to do yourself and shouldn’t cost you any more than five dollars.
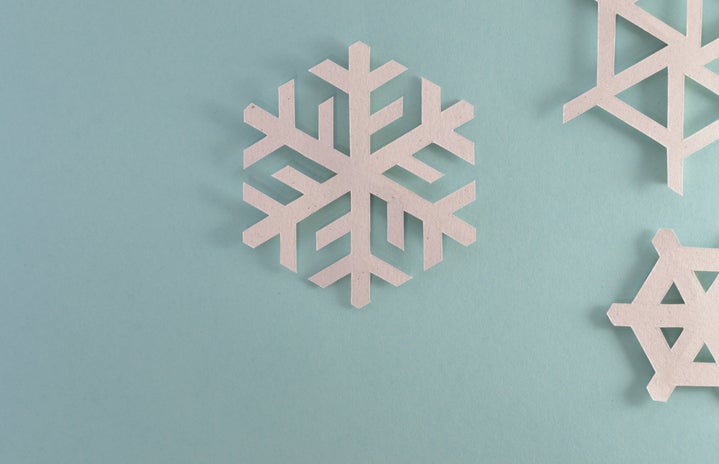
Paper snowflakes
What You Need:
- White Printer Paper
- Scissors
- Tape (optional)
- Pencil (optional)
Creating the Snowflakes:
- Start by folding one of the top corners of your sheet of paper diagonally, creating a right triangle with a rectangle of excess paper left on the bottom. Cut off this excess rectangle paper and unfold it to create a perfect square.
- Fold the square in half diagonally, creating a triangle shape, and press down on the fold to create a crease
- Fold the triangle in half to create a smaller triangle shape, ensuring that all the edges align neatly before creasing the fold.
- Fold the triangle into thirds, creating a triangle with two pointed corners similar to an arrowhead shape. Trim the pointed ends.
- Now is where you get creative. Use a pencil to trace out your desired look or just take your scissors and snip away at the triangle until you’re satisfied. Remember, no two snowflakes are the same, so don’t stress about your snowflake being perfect.
- Gently unfold the snowflake to reveal your one-of-a-kind snowflake design.
Repeat these steps until you have your desired number of snowflakes to display. You can then stick them right onto your wall, use ribbon or string to hang them from the ceiling or just scatter them around to create a winter wonderland wherever you wish.
Pipe cleaner christmas trees
What you Need:
- 8 green pipe cleaners
- Sheet of paper
- Pencil
- Tape or glue
- Drawing compass (optional)
- Decorating Materials (optional)
Creating the Trees:
- Fold pipe cleaners in half and cut to create equal halves, then fold those in half and cut so that you are left with 4 pieces of equal length. Repeat this process for all of the pipe cleaners, leaving you with 32
- Fold all 32 pieces in half, creating the leaves for your tree.
- Use a pencil or a drawing compass to sketch a large circle on your sheet of paper. Mark the center of the circle, then cut out the circle.
- Cut a straight line from the outside of the circle to the center. Take the two edges and cross them, bringing them around to the opposite side. Make sure to change the angle so that the center forms a point, creating a cone shape. Once you’re happy with the height and width of your cone, use tape or glue to secure the edges and secure the cone shape.
- Begin to tape or glue your folded pieces around the base of your cone, going all the way around the cone and securing each piece. Repeat this process about eight more times, moving further up the cone with each ring of pipe cleaner leaves until the entire cone is covered.
- Take the edges not secured to the cone and bend them slightly upwards to fan out the tree branches.
Once you’ve completed these steps, you’ll be left with a cute mini tree that is perfect for any small space. You can also use beads, ribbons or anything else you have lying around to mimic Christmas tree ornaments and decorations.
gingerbread house garland
What You Need:
- Cardboard
- Pencil
- Scissors or a craft knife
- Ribbon or String
- White Paint and Brush or White paint marker
Creating the Garland:
- Using a pencil, trace 5-6 (number can vary depending on how long or short you want your garland to be) different house shapes out on a piece of cardboard. Feel free to print out templates to trace or create your own.
- Cut out the house shapes. Make sure to also cut holes in any windows you want light to shine through.
- Use white paint or a paint marker to add details to your house, mimicking icing. Outline the houses with white, add shingles to the roof, a door, window detailing or even some snow decorating the front.
- Make a hole or a slit big enough to thread your ribbon or string through underneath each side of the houses’ roofs. Thread your ribbon through each of the holes, making sure to go behind each of the houses to show as little ribbon or string as possible.
Once your garland is finished, feel free to hang it wherever you like. Placing it in front of the window will allow natural light to shine through the windows of your gingerbread houses, but displaying it on a wall or from a shelf is also great way to display your gingerbread creation.
Holiday banner
What You Need:
- Large sheet of paper or poster board
- Markers, Colored pencils or Paint
- Pencil
Creating the Banner:
- Sketch out your banner design on your large sheet of paper or posterboard with a pencil. You can create your own unique design or use some pics as inspiration for your creation.
- Color and decorate your banner with your art supply of choice. Markers, paint, colored pencils or even crayons can be a great way to add some color and life to your design.
Once it’s colored, you’re done! If you want to add extras such as glitter or feel free. This idea probably allows the most creative liberty and is the perfect way to create some last-minute holiday décor that is simple and cost-effective.
Paper plate wreath
What You Need:
- Paper Plate
- Scissors
- Green tissue paper
- Festive ribbon
- Tape or Glue
Creating the Wreath:
- Fold your paper plate loosely in half. Cut out the inner part of your semicircle to your liking then unfold your plate to reveal a ring-like shape.
- Cut your sheets of green tissue paper into small square-sized pieces. Loosely crumple the pieces of tissue paper and tape or glue each piece to the concave side of the paper plate ring until the entire plate is covered.
- Cut a decently long piece of ribbon and tie it into a bow. Attach the bow at the top or bottom of your wreath.
Once the bow is attached feel free to take creative liberties. Mini red pom-poms can be attached to mimic holly berries. Ornaments or fake poinsettias can be added to give the wreath more depth. The creative possibilities are truly endless.
Happy Decorating!


