The Her Campus National Editors write about products we love and think you’ll love too. Her Campus has affiliate partnerships, so we get a share of the revenue from your purchase. All products are in stock and all prices are accurate as of publication.
Congratulations! Art is a wonderful and enriching hobby, and there’s no better time to start than the present. If oil paints and digital art seem too costly and too intimidating to dive into, watercolor is your new best friend. I started painting with watercolors last spring. It’s a beautiful art form, not just for the magical results it creates, but because it’s so accessible. A lot of the supplies you need are in your home. All you need are easy to use (and inexpensive) children’s art kits and literally just water!
Here are 7 tips to get started as a watercolorist.
My tips aren’t going to teach you much technique—I’m still struggling to get that down myself. But they will help you to set up your palette, to make some initial supplies-gathering decisions, and to reassure you that there is more to watercoloring than the gorgeous finished product
1. There are only four brushes you really need. Seriously. That’s it.
This tip is the one that will save you the most money, it’s true. Most watercolor kits come with at least one of the brushes I listed below. All the brushes you need to get are:
- A small round brush (size two)
- A medium round brush (size four)
- A bigger medium round brush (size six)
- A wide flat brush (three-quarters of an inch)
Feel free to invest in different size and shape brushes once you’ve developed some mastery over these. But trust me, you can paint all you want to with just the small and medium round brushes! My small round brush is my favorite of the whole bunch, I use it for everything! The two medium-sized round brushes are great for adding different details and shapes to an illustration. The wide flat brush is great for laying down broad washes of color.
To plug a local New Haven business, Hull’s Art Supplies always has everything you need on sale.
2. You don’t need every single color.
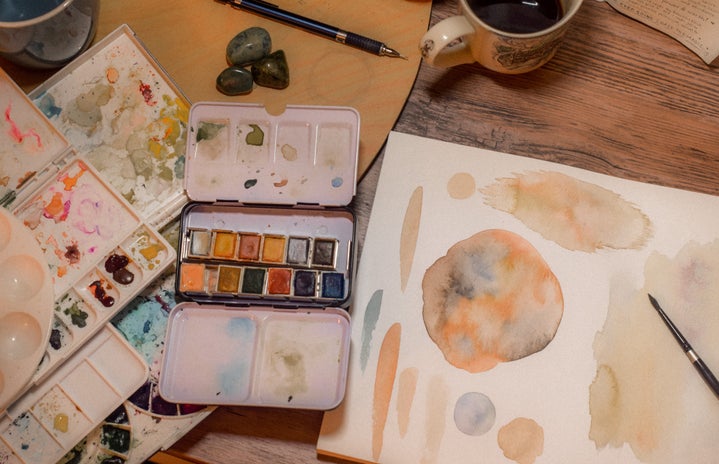
A lot of watercolor kits come with tins and wells of dried color blocks in every color you need to start out with. These are very straightforward to use, and I recommend using them as a beginner. However, if you’re looking into building your own palette and owning tube watercolors, listen up.
Here is my recommended starter list of colors to invest in:
- Cadmium Red
- Cadmium Yellow
- French Ultramarine
- Raw Umber
- Prussian Blue
- Burnt Sienna
- Hookers Green
If you want your watercolors to be vibrant and expressed on the page in their truest form, you want to keep your palette freshly stocked with color. If you’re using liquid tubes of paint, keep each palette vessel at least two-thirds of the way full. When it dries up, add water. At the point where you can no longer draw color from it because it is too old and hard, then you can scrape it out and reapply fresh paint.
Arrange your palette from one end of the color spectrum to the other, with warm colors on one side, and cool colors on the other. This will naturally help you begin to process the ways that colors group themselves together in real life. You should also have access to a color wheel, which will show you the mixing combinations you can use to create any other color you may be lacking in your palette. You’ll find a lot of depth in a single tube of color by varying how much water you add to it. This is the optimal way to save money while setting up your initial palette and learn basic color theory. You’re welcome. Speaking of color theory…
3. Avoid the color black in your watercoloring.
An easy beginner mistake is to rely on black to add shadow and line-art to your paintings. This is a major mistake. What shadow is truly black? Where in nature do we see pure black so dark that you can’t make out any other color? It’s rare, if found anywhere at all. Black paint sucks the depth out of your layered pieces, it smudges and runs terribly against any other color, and, in general, is very, very difficult for beginners to wield. Stay away from black paint as you’re just starting out. In the same vein…
4. Avoid the color white in your watercoloring.
White paint is useful for lightening up some colors, sure, but consider adding more water instead. Adding white paint destroys the delicate transparency of the watercolor, creating a film over the paper. Your goal is to master the art of layering washes of color, adding depth as each layer dries. White paint steals that depth. However, white paint is a beautiful tool when used sparsely. Use white paint to add a life-like glint in the eyes of a portrait. Use it for the lightest touch of highlight on a golden building façade. Try it out for a focal point for an abstract piece. It’s particularly striking when you’re painting on tinted paper. In general, however, stay away.
5. Don’t underestimate the power of negative space.
Leaving parts of the page blank, creating negative space around which you add color and forms, can be just as effective as drawing in the space itself. Take John Singer Sargent’s work, for example. Notice how the negative space of the page creates the sunlight on the water and the highlights on the buildings and bodies. The eye is drawn to the focal points of the gondola drivers, and we clearly see how they are in motion because they are given space to exist on the page. Blank space is perfectly evocative when used correctly.
6. Use more color and less water than you think.
Many beginning watercolorists fear color. They are worried their piece will look too bright and flashy and unrealistic. I challenge this by asking: what part of the trees do you remember the most? Is it the gorgeous blend of green in their leaves? Why, then, in your representation of that beautiful green, would you dilute the color? What part of art makes you feel reserved? When the goal is the make the viewer feel and see the same things you felt and saw, more color is always better.
Another common mistake is to dim the colors with too much water. Yes, a big part of watercoloring is about water, but you can’t finish a piece when you have added so much water that you destroy the paper, and whatever you are illustrating along with it! At a certain point, the colors will not dry on the page correctly. I’ve made the mistake before, and you’ll probably make it too. I’m warning you now to save you the dollars it’ll cost to buy more paper. (On paper: 90 pound paper is good, 100+ pound is best! I recommend this 140 pound sketchbook.)
To summarize: use more paint, and less water.
7. Be patient—with your technique and your subject.
Patience is one of the greatest traits watercoloring helps you develop. When watercoloring you will find yourself patiently mixing your colors until they’re fully, artfully blended. Patiently working with the flow of the water across your page, trusting it and guiding it, and not rushing it along. Patiently waiting for the page to dry—which, by the way, is faster outdoors, in the sunlight (although if indoors, you can use a blow-dryer—but I don’t fully endorse that method).
When thinking about the subject of your watercolor, don’t give it a glance and then assume you know what colors you see. Clouds are not white, despite what you may think. Give them a second look. Notice their blue-ish shadows. The trees and their leaves, are they actually green and brown? They’re not. Look more closely. See the red, the blue, the yellow. Notice the amalgamation of colors, tease out the nuance. Trust your perception, but don’t rush. Be patient. Your paint will still be waiting and ready for you to begin.
Watercolor will train you to look at the world carefully.
After a year practicing watercoloring, I notice subjects on a daily basis that make me want to drop everything and paint. Once you begin to notice the finest details in everything, the world itself starts to look like a painting. It’s the kind of romanticism that gets you out of bed in the morning. Watercolor brought new purpose to my life, and I hope it’ll do the same for you.


