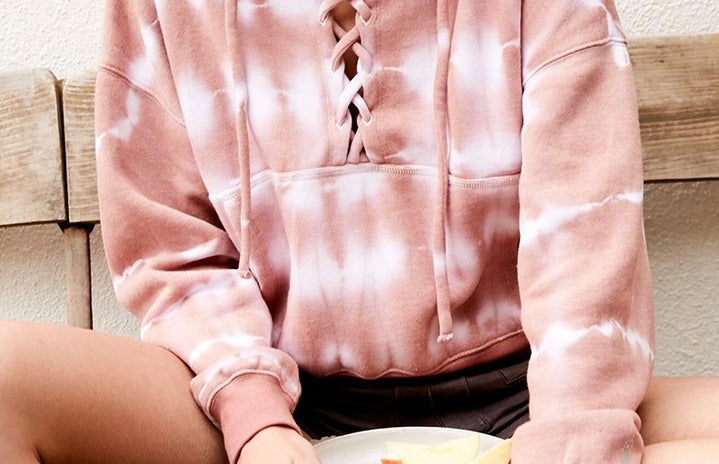
Believe me when I say having a closet of clothes and nowhere to go is sad. So many people are taking this time in quarantine to purge closets and drawers of everything that won’t be useful in the future. However, before you toss that solid white tee or that black oversized shirt that is more drab than fab, let’s think a little more sustainably and creatively before deciding it needs to go.
Upcycling old clothes is a great way to help out both your closet and the environment, and one fun, fashionable (and most importantly, easy) method of upcycling is tie dying. Recently, tie dye has been a huge trend on social media and among retailers like Nastygal and Garage Clothing. But the charge on a simple tie dye tee can be way more than it actually costs to do it yourself. If you want to hop on this trend without forking over more money than it’s worth, let me take you through the steps to make a $30 tie dye shirt for a fraction of the cost.
- Grab your supplies
-
The most important things you need when you’re tie dyeing is to figure out what clothing item you’re dyeing and the colors of dye you want to use. The most common items are white t-shirts, but the items are endless. Tie dye bodysuits and sweatpants have been circulating on the internet like this set from Garage (hoodie $40, sweatpants $40), so definitely don’t feel like you’re limited. Take inspirations from sets like this for your colors but for less than $100.
As for the dye, all you need is some cheap fabric dye in the color you want. Check out these cheap dyes from Michaels ($5) that come in tons of colors. You definitely don’t need to spend tons of money on a kit, so just pick and choose only what you’ll need.
You’ll also need disposable gloves, squeeze bottles (like the ones used for ketchup at restaurants), dish soap, rubber bands, a bucket of water, and black garbage bags.
- Set up your station
-
Once you have your supplies, go ahead and cut a black garbage bag in half, so it lays down flat with the solid black side up. Before tie dyeing, you need to soak your clothing item in water to help the dye saturate. Then you can lay out your wet item flat on your garbage bag surface.
Next, prepare your dye. Pour some water and a little bit of dish soap into however many squeeze bottles you have for each color and add your dye. Proportions depend on how saturated you want the color to be. For more opaque colors, add more dye and less water. For less color, use more water and less dye. And once you have your gloves on, you’re ready to go.
- Shape up
-
Clothing gets that tie dye effect based on how you shape the object you’re dyeing. This is where your rubber bands come in.
For a basic tie dye t-shirt, you are going to pinch the middle of your shirt and twist the shirt until it scrunches up. Once it scrunches up, take rubber bands and wrap around four to six rubber bands around the shirt to keep the shirt tightly scrunched, sectioning off portions of the top where you’ll put your dye.
There are tons of variations of scrunching that can result in different designs, so definitely do your research for very specific designs. For a basic example, look at this tutorial from YouTuber Angelynn to get an idea of what scrunching method will result in what look.
- Time to tie dye
-
Now comes the fun part. Take your squeeze bottles of dye and douse your item sporadically with however much dye you want. Make sure you get both sides. Have fun with this! If you aren’t sure how much has been covered, you can untie the item, lay it out and squeeze more dye as necessary. Just make sure to wrap it back up in the rubber bands to maintain the scrunch.
And once you’re satisfied, use the garbage bag to wrap it up tight to be left overnight.Check out the clip above from Charlotte Southwood on Instagram (@charsouthwood) creating a tie dye hoodie to give you some inspiration.
- Next-day duties
-
So you let your clothes sit out overnight and the item is relatively dry. Great! Now all you have to do is wash the dye off.
With your gloves on, rinse the item in cold water to wash out any excess dye. And once you’ve washed out the excess dye, stick it in the wash and dryer by itself to avoid color transfer to other clothes. And you’re done!
See? That wasn’t so bad, right? Tie dyeing has definitely become a popular trend for people looking to repurpose and revamp old clothes and also for those trying to cope with how difficult life is right now. We are all looking for different outlets to release any tension from stress, so tie dyeing has become another great addition to a list of creative activities. If you try it yourself, tag Her Campus on the socials, so we can admire your hard work. Happy tie dyeing!


